43 using excel to create mailing labels
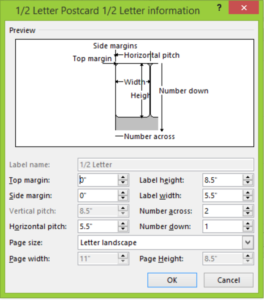
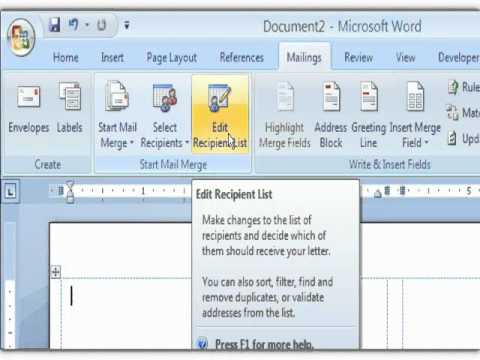
How to Create Mailing Labels in Word from an Excel List Select the first label, switch to the "Mailings" tab, and then click "Address Block." In the "Insert Address Block" window that appears, click the "Match Fields" button. The "Match Fields" window will appear. In the "Required for Address Block" group, make sure each setting matches the column in your workbook. Print Mailing Labels in Excel - Complete Step-By-Step Select Start Mail Merge > Labels from the drop-down menu. Select the brand from the Label Vendors box, followed by the product number from the Product Numbers list. If you wish to input custom label dimensions, choose New Label. Once you are prepared to continue, click OK. 3. Connect the spreadsheet to the label
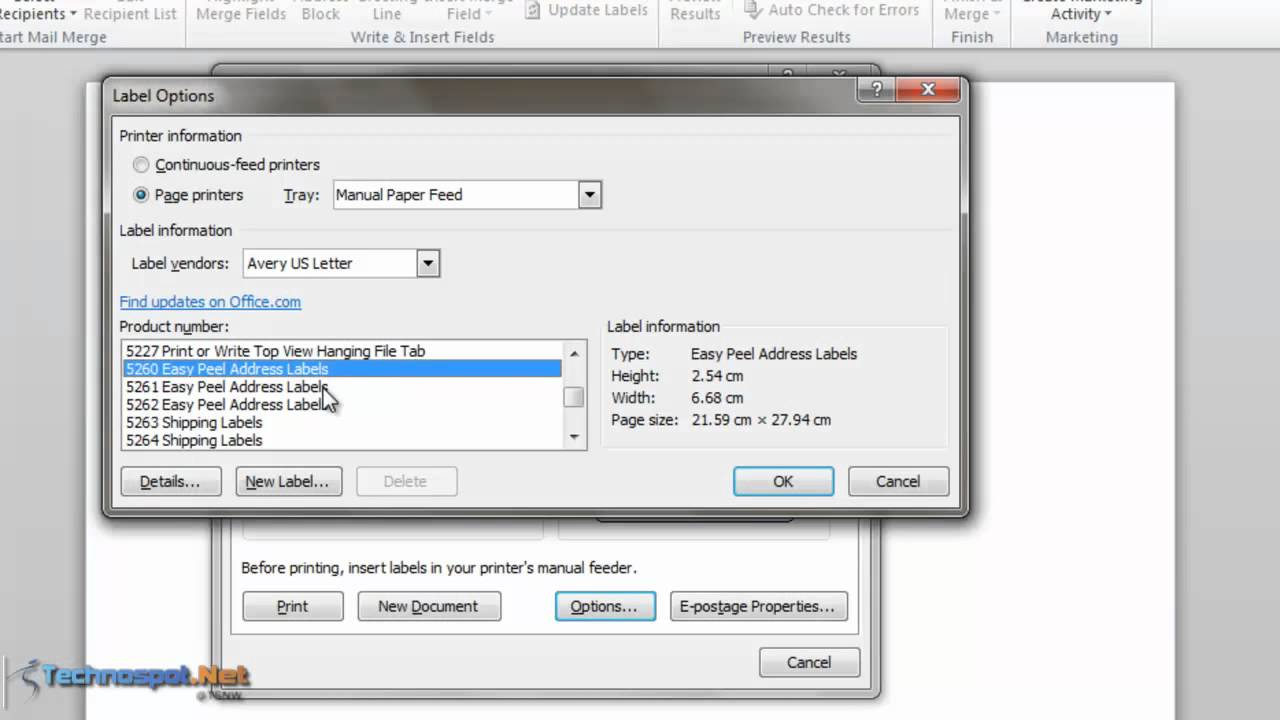
How to Print Labels From Excel - Lifewire Go to the Mailings tab. Choose Start Mail Merge > Labels . Choose the brand in the Label Vendors box and then choose the product number, which is listed on the label package. You can also select New Label if you want to enter custom label dimensions. Click OK when you are ready to proceed. Connect the Worksheet to the Labels
Using excel to create mailing labels
Create and print labels - support.microsoft.com Create and print a page of identical labels Go to Mailings > Labels. Select Options and choose a label vendor and product to use. Select OK. If you don't see your product number, select New Label and configure a custom label. Type an address or other information in the Address box (text only). How Do I Create Avery Labels From Excel? - Ink Saver Create the Spreadsheet: Open your MS Excel and start creating the spreadsheet in question. Fill out all the data you need to be labeled. Once done, save the document to a directory you can remember as we will use it later in the procedure. 2. How to Create Address Labels from Excel on PC or Mac menu, select All Apps, open Microsoft Office, then click Microsoft Excel. If you have a Mac, open the Launchpad, then click Microsoft Excel. It may be in a folder called Microsoft Office. 2. Enter field names for each column on the first row. The first row in the sheet must contain header for each type of data.
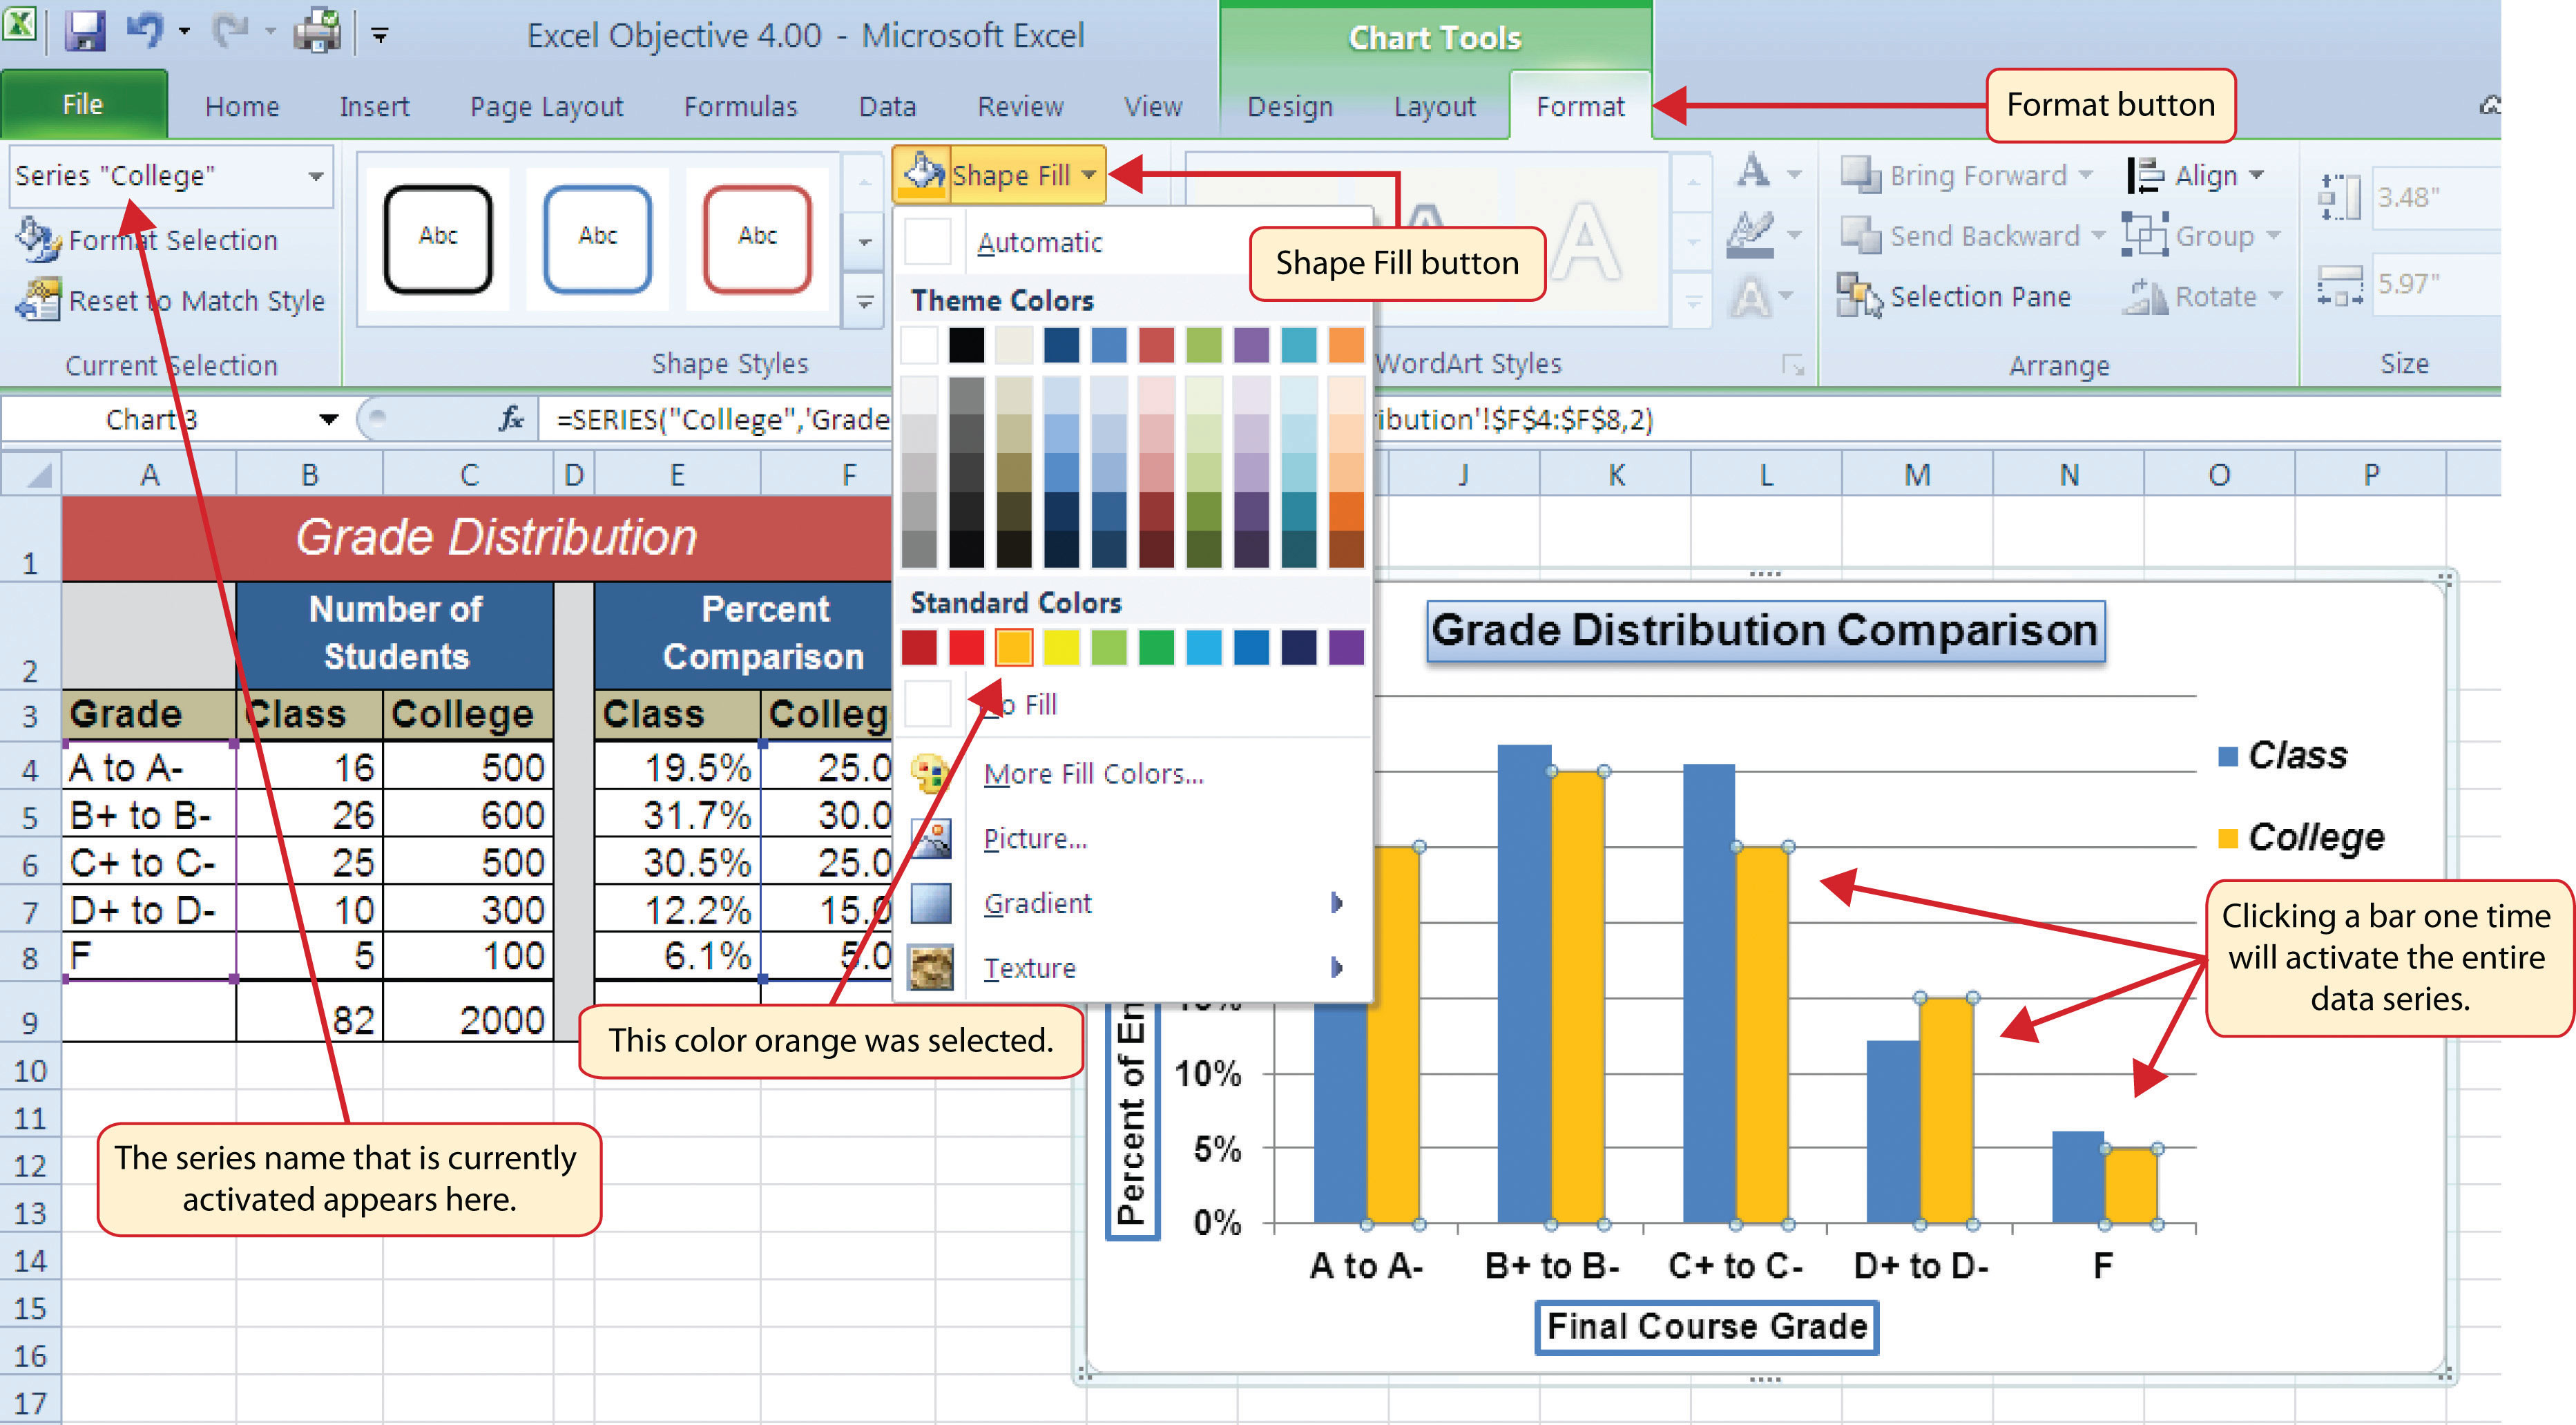
Using excel to create mailing labels. Create Mailing Labels In Word Using Mail Merge From Excel Creating a Mail Merge for Labels with Word and Excel and adding an image or logo! This video will show you how to quickly create Mailing Labels using Word and Excel. Additionally if you wanted to add a logo you'll need to right-click on the logo field in Word and change it to "include picture". Mail Merge from Excel to Microsoft Word. How To: Create Mailing Labels Using Excel and Word Open a new document in Word and go to the Mailings section. Click "Start Mail Merge" (in older versions of Word I believe this is called Mail Merge Wizard). From the Mail Merge options you want to select "Labels". A pop-up window is displayed allowing you to select the type of label you are creating (the most popular mailing labels are Avery 5160). How to Mail Merge Address Labels Using Excel and Word: 14 Steps Close Excel. 3 Open Word and go to "Tools/Letters" and "Mailings/Mail Merge". If the Task Pane is not open on the right side of the screen, go to View/Task Pane and click on it. The Task Pane should appear. 4 Fill the Labels radio button In the Task Pane. 5 Click on Label Options and choose the label you are using from the list. Mail merge using an Excel spreadsheet - support.microsoft.com Choose Edit Recipient List. In Mail Merge Recipients, clear the check box next to the name of any person who you don't want to receive your mailing. Note: You also can sort or filter the list to make it easier to find names and addresses. For more info, see Sort the data for a mail merge or Filter the data for a mail merge. Insert a merge field
Create Mailing Labels in Word from an Excel Spreadsheet I am trying to create mailing labels from an Excel Spreadsheet. The Spreadsheet has a total of 1236 names and addresses so it's big but not huge. My Mac has plenty of memory and disk space and yet when I get to the part where Word is converting the Excel Spreadsheet I get a message that says: "There is not enough memory or disk space to convert ... Make and print Excel labels from worksheet data - Ablebits Open your sheet and run the Create Cards tool. Enter the number of columns you want to see on the resulting worksheet. If needed, add an empty row and column between the cards and, optionally, tick off "Add header" and "Preserve Formatting". Click Create button and find the labels on a new sheet. Find a more detailed description here. Microsoft Word : How to Create Labels From Excel - YouTube Labels can be created in Microsoft Word using data from Microsoft Excel by saving the data in Excel and doing a data merge. Open a data source and merge the ... How To Create Mailing Labels - Mail Merge Using Excel and Word from ... In this video I show you how you can print mailing labels using the mail merge function in Microsoft Office 365 Word and Excel. This isn't hard, but if you d...
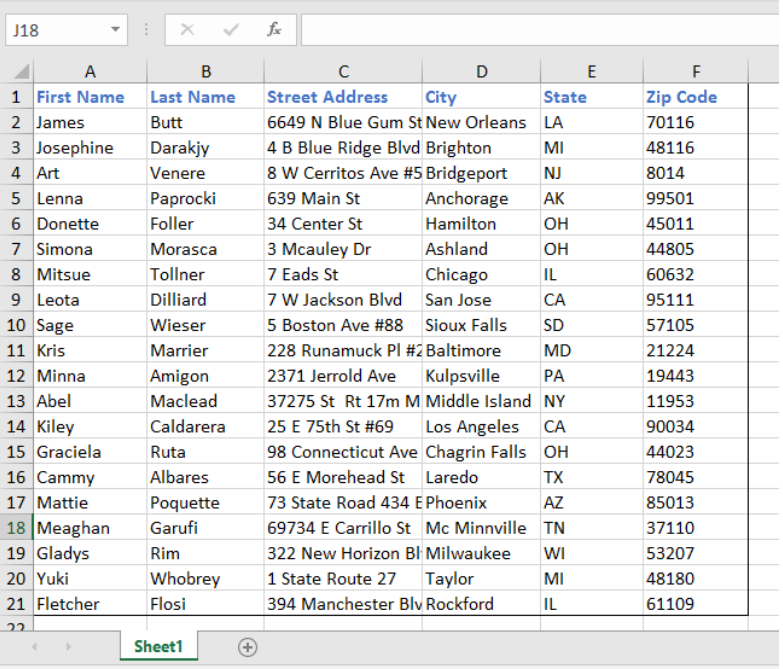
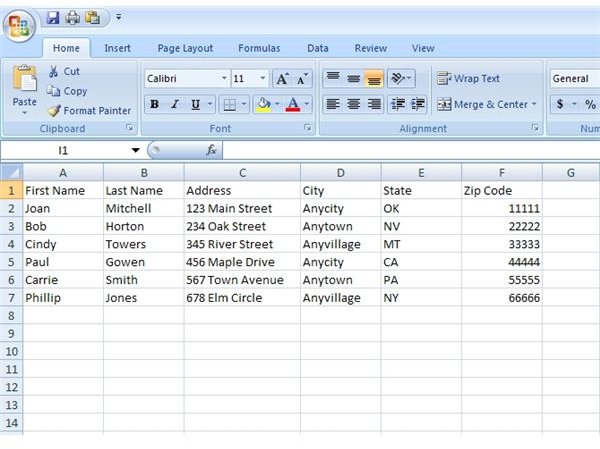
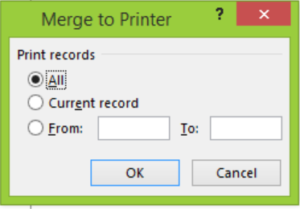
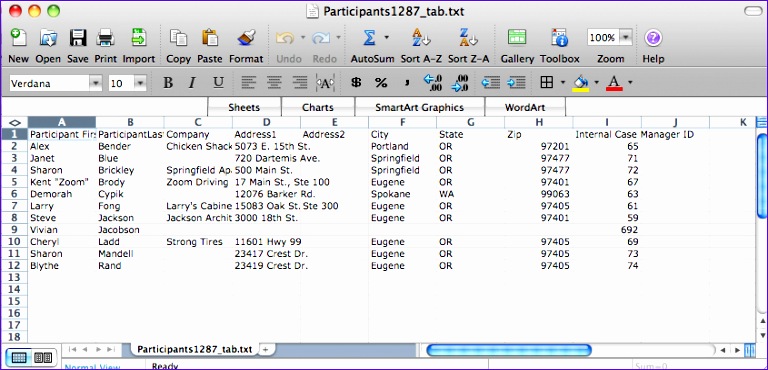
Create and print mailing labels for an address list in Excel To create and print the mailing labels, you must first prepare the worksheet data in Excel, and then use Word to configure, organize, review, and print the mailing labels. Here are some tips to prepare your data for a mail merge. Make sure: Column names in your spreadsheet match the field names you want to insert in your labels. How to Create Labels in Word from an Excel Spreadsheet On Excel's spreadsheet screen, select the first cell in the first row and type First Name. Select the first cell in the B column and type Last Name. Similarly, add Street Address, City, State, and ZIP Code to the C, D, E, and F columns' first rows, respectively. Now add the data beneath each header you just created. How to Print Address Labels From Excel? (with Examples) Go to the "Mailings" tab and choose the " Use an Existing List " option from the select participant's category. It displays the "Select Data Source" dialog box in the screenshot below. First, choose the Excel sheet in which the table created is presented and click on "Open." Next, choose the table name and click on the "OK" button. How to mail merge and print labels from Excel - Ablebits You are now ready to print mailing labels from your Excel spreadsheet. Simply click Print… on the pane (or Finish & Merge > Print documents on the Mailings tab). And then, indicate whether to print all of your mailing labels, the current record or specified ones. Step 8. Save labels for later use (optional)
How to make labels from Excel using Mail Merge
How to mail merge from Excel to Word step-by-step - Ablebits Browse for your Excel file and click Open. Then, select the target sheet and click OK. By setting the connection between your Excel sheet and the Word document you ensure that your mail merge data source will be automatically updated each time you make changes to the Excel file that contains the recipient details.
How to Create Mailing Labels in Excel | Excelchat
Easy Steps to Create Word Mailing Labels from an Excel List Use the Insert Merge Field button to select the fields in your Excel file and add them to the label. You only need to do this to the first label. Make sure you include spaces, enters, commas as you want them to appear. Once you've picked all your fields, it should look something like this.
How to Create Mailing Labels in Excel | Excelchat
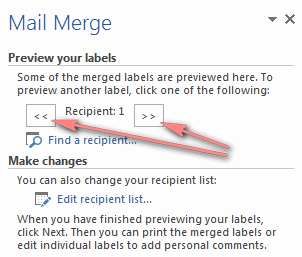
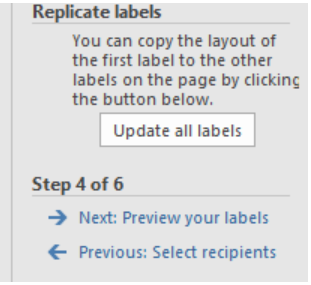
Print labels for your mailing list - support.microsoft.com Choose Select recipients > Browse to upload the mailing list. Select your mailing list table and then OK > OK. Select Arrange your labels > Address block to add recipient information. Select OK. To replicate the first label, select Update all labels . Select Preview your labels to edit details such as paragraph spacing.

Printing mailing labels excel | Download them or print
How to generate mailing labels from Excel using Office 365 Home ... Merging your mailing lists with documents you want to send via e-mail is easier with essential steps clearly described. The mail merge tool in Word 2007 can streamline the process of getting the word out to many recipients — without manually personalizing a multitude of e-mails . Step 1: Creating the Main Document
How to Create Mailing Labels in Excel | Excelchat
How To Print Mailing Labels From Excel [Address List Example] Then, create a new blank document. On the new document, click 'Mailings' from the tab list. Click the 'Start Mail Merge' icon and select 'Labels…'. A window titled 'Label Options' will open. On the 'Label vendors', select 'Avery US Letter'. On the 'Product number', select '5160 Address Labels'. Press 'OK'.

How To Create Printing Labels From Excel - RSTIKE
How to Create Mailing Labels in Excel | Excelchat Step 1 - Prepare Address list for making labels in Excel First, we will enter the headings for our list in the manner as seen below. First Name Last Name Street Address City State ZIP Code Figure 2 - Headers for mail merge Tip: Rather than create a single name column, split into small pieces for title, first name, middle name, last name.
How to Create Address Mailing Labels in Microsoft Word 2007 Using Excel Data - YouTube
How to Make Mailing Labels from Excel 2019 | Pluralsight Find your Excel spreadsheet from Step #1 and click Open . 8. Review the data and click Ok. Click Next: Arrange your labels. 9. Move your cursor to the first label and click Address block. Select your preferred formatting (using the preview pane). 10.
How to Create and Print Mailing labels in Microsoft Office Word - YouTube
How to Print Labels From Excel - EDUCBA Step #3 - Set up Labels in a Blank Word Document In a blank word document, Go to > Mailings, select > Start Mail Merge, select > Labels. A new pane called Label Options will open up. Under that, select Label vendors as Avery US Letter, Product number as 5160 Address Labels. Then, click OK. See the screenshot below.

How To Make Printing Labels From Excel - STICREK
How to Make and Print Labels from Excel with Mail Merge Before you can create labels from Excel, you'll need your existing mailing list in the application. ... you can save your work and continue to the next step to create labels from Excel. How to ...

How to create labels from a list in Excel
How to Create Address Labels from Excel on PC or Mac menu, select All Apps, open Microsoft Office, then click Microsoft Excel. If you have a Mac, open the Launchpad, then click Microsoft Excel. It may be in a folder called Microsoft Office. 2. Enter field names for each column on the first row. The first row in the sheet must contain header for each type of data.
How to Make Mailing Labels Using Microsoft Excel 2007
How Do I Create Avery Labels From Excel? - Ink Saver Create the Spreadsheet: Open your MS Excel and start creating the spreadsheet in question. Fill out all the data you need to be labeled. Once done, save the document to a directory you can remember as we will use it later in the procedure. 2.
How to Create Mailing Labels in Excel | Excelchat
Create and print labels - support.microsoft.com Create and print a page of identical labels Go to Mailings > Labels. Select Options and choose a label vendor and product to use. Select OK. If you don't see your product number, select New Label and configure a custom label. Type an address or other information in the Address box (text only).
6 Mail Merge Excel Template - Excel Templates - Excel Templates

10 Excel Mail Merge Template - Excel Templates
35 Label Of Microsoft Excel - Label Design Ideas 2020

How to Print Labels from Excel - All Things How
Post a Comment for "43 using excel to create mailing labels"