40 how to make name labels on cricut
How to Make Labels with a Cricut | The DIY Mommy Let me show you how easy it is to make labels with a Cricut cutting machine with this simple video tutorial. Whether you want labels to help organize your pantry or fridge, or if you want to label your handmade creations to sell, using a Cricut to make vinyl labels is such a fun and beautiful solution! I love the look of vinyl labels, and there ... Create Handwritten Labels by Cricut - WhipperBerry How to Write on Avery Labels with Your Cricut - Handwritten Label Inspiration This is such a simple beginner project that anyone at any creative level can create for their home with their Cricut machine. For this industrial-style label, I kept things simple. I really only needed a "handwritten" tea name with a rectangle cut around it… Pretty basic.
How to Make Labels with a Cricut | The DIY Mommy - YouTube Learn how to make DIY vinyl labels with Cricut for organizing your home or labeling handmade products! Subscribe to my channel for more DIYs: ...

How to make name labels on cricut
Make DIY Iron-On Fabric Name Labels | The DIY Mommy Instructions: Cut a piece of the Heat n Bond into a standard letter paper size (8 ½ " x 11") so that it will easily feed through your printer. Fuse the Heat n' Bond to the cotton canvas fabric with an iron on low heat (follow the directions on your Heat n Bond packaging). Trim the fabric to the size of the Heat n Bond. How to Make Vinyl Labels with a Cricut | A Comprehensive Guide Start by opening Cricut Design Space and use the search bar in the Image Library to find pictures for everything you want to label. Select images that are both simple in design and intuitive to understand. Notice the three images I selected below are not single color/layer images when I first place them on my canvas. Cricut Labels: 3 Ways to Make Them - The Country Chic Cottage Choose both objects and click flatten to make the label a print then cut. Repeat for as many labels as you need. Print when prompted in Cricut Design Space then add to your machine for the cutting. Peel and stick the labels once complete to any surface. Tried this project? tag us to show off your work!
How to make name labels on cricut. 3 Ways To Make Labels With Your Cricut - YouTube It's a lot easier than you may think, and in this video, Rachel shows three different ways you can make labels with your Cricut. From drawing to print then cut, labels can be made easily and with... How to Make Labels Using a Cricut Machine from 30daysblog Apply pressure and really rub it on to make sure that it transfers well. My scraper is one my most used tools when it comes to using vinyl. TRANSFER THE DESIGN. Next, carefully pull the transfer tape up, making sure that all letters are on the transfer tape and not left behind. How to make labels with Cricut Make labels with Cricut Step 1 To design from scratch, click "New Project" on the home page of Cricut Design Space. Step 2 Once on the canvas, on the left-hand navigation bar, you'll see an option for "Images." Step 3 Click that button. You'll now be able to search in the Cricut image library! How To Create Labels With The Cricut Label Maker With your material set to Vinyl, load your mat with the Vinyl attached to it and follow the instructions on the screen by pushing the buttons on your machine as they blink. Your Cricut Maker will do its magic and print your labels on your mat exactly where you positioned your work on the "virtual" mat on your screen. It's awesome!
How To Make Labels With A Cricut Joy - Step By Step Guide Use a tape measure on the item you are labelling, to work out how wide and tall you want the label to be. You'll need this information when you create the design in step #5. We wrote down the dimensions for everything and then got the Cricut and my laptop out…. Step 3: Choose The Right Vinyl For The Project Easy DIY Back to School Labels Made with a Cricut Open a New Canvas in Design Space and Select Box Shape then Click on the little lock icon on the bottom left corner to be able to turn the box into a rectangle large enough to fit the name inside and then click on the color to change from grey to white (or whatever your desired color is. Select Text and type in your child's name. How to Make Stickers on a Cricut - Jennifer Maker Materials to Make Stickers. View my Amazon shopping list with the exact items we used to make this project. White Sticker Paper. Clear Vinyl Sticker Sheets. White Vinyl Sticker Sheets. Printable Vinyl. Transparent Vinyl (optional) Sallim Font (optional) A method to print and cut your stickers - I used the Cricut Maker 3 but you can also use ... Five Ways to Make Labels with Cricut Joy Use the writing style text tool to type your label name (I used the Cricut writing font Close To My Heart), and center in the label. Use the Attach tool to connect your text to your label. Repeat with your other labels. Once you're done designing your labels, click Make It in the upper left. You will be taken to the Prepare Screen.
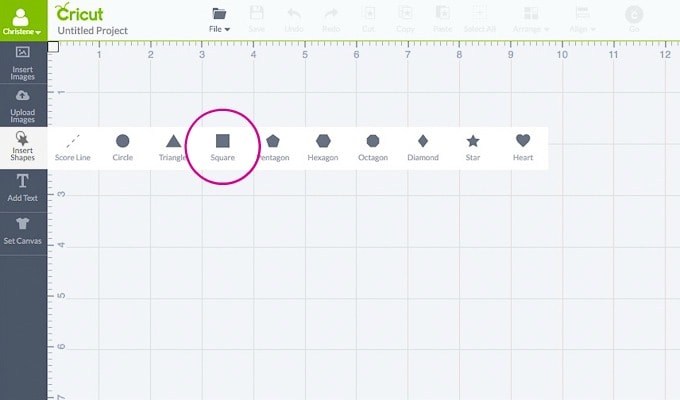
How to Make Name Label Sheets with the Cricut First, open Cricut Design Space. Click on "images" and insert a square. Click on the lock on the lower left hand corner of the square to unlock the square. Size the square to how large you would like the name label sheet. Mine is 6″ by 12." Click on "images" and insert a 1.5″ circle. Click the "text" icon on the left hand panel. How to Make Vinyl Labels with a Cricut Cutting Machine Step 2- Create your design. If you are using a Cricut machine, you can find my exact project in Cricut Design Space here. To design my labels, I used a Cricut font called Balega Std Regular. I measured the bins I was labeling to figure out the best size, and I ended up using 55 pt font for my project. I simply typed out my wording to my desired ... How to Make DIY Iron On Labels - Abby Organizes With my EasyPress heat press heated to 315 degrees, I pressed the label for about 15-20 seconds on cotton material and 10-15 seconds on dri-fit material (3). I lifted the press and removed the parchment paper, and my label was adhered (4)! Modifications for Non-Cricut Users You will go through the same pressing process with a traditional iron. How to Make Name Label Sheets with the Cricut - Pinterest Cricut Pens Hack. Cricut Explore Air. Cricut Cuttlebug. Cricut Cards. Dollar Tree pencil grips cut to fit around a sharpie. Remove the Cricut Explore Pen Holder, and insert this instead. It holds all sorts of pens and markers and keeps them centered. T. The Speckled Loon.
Cricut Explore Essentials: How to Make Pretty Organizing Labels » Christene Holder
Printable Labels with Print then Cut on Your Cricut Machine Click flatten in the lower right-hand corner to make this a print then cut label and it is ready for your machine! Be sure to delete any labels you don't want to use before continuing. Step 3: Making Printable Decorative Labels with Print Then Cut Now it is time to use print then cut to actually make our printable labels.

Cricut Explore Essentials: How to Make Pretty Organizing Labels » Christene Holder
DIY Pantry Labels on a Cricut Joy, Explore, or Maker! To make a simple label, click on Shapes, select a shape, and size it to fit your container. Now click Text, type your ingredient name, click and drag it on top of your label shape, and resize it until it fits your label well. With the text still selected, go to the Linetype menu and choose Draw.
Cricut Freebies | Tutorials for Your Cricut Projects
How to make sticky labels using Cricut | The Font Bundles Blog 8- Highlight all the text and then click on the group icon. 9-To make the label click on the shape icon and insert a square. Unlock the shape and make into a rectangle. 10- Click on the square in the layer tab and then change the colour to lilac. 11- Highlight the text and then click on the align drop down box.

How to Make Name Label Sheets with the Cricut
How to Make Name Label Sheets with the Cricut | School name labels ... No worries Check out this step by step tutorial using Cricut to make your own labels! J. Jen Groom. Cricut. Cricut Help. Cricut Air. Cricut Vinyl. Vinyl Paper. Create Labels.

Cricut Explore Essentials: How to Make Pretty Organizing Labels » Christene Holder
Address Labels with Cricut - Crafting in the Rain Print then cut address labels Start by creating a rectangle that's 2.8 inches wide by .8 inches tall. Type 3 separate text lines. The first is your name. The second and third are your address. By keeping them as separate lines, they will be easier to space properly. Choose a font for your name.

How to Make Name Label Sheets with the Cricut
Create a Set of Back-to-School Name Labels - Creative Fabrica Insert your sticker paper or printable vinyl into the paper tray as per your own printer's settings and then click the "Send to Printer" button. Wait for the dialogue box to pop up and make sure to add the bleed lines. This will help to ensure that your colored background fills to the edges.

How to Make Pantry Labels with Cricut Joy | Pantry labels, Spice jar labels, Diy pantry labels
Print & Cut Label Tutorial in Cricut Design Space Step 18: Now the project is ready. Take the printed page with the black border and place it on your mat. Load it in the machine with the "arrow" button, and Press the "C" button to start the print and cut. When the images are cut, remove the mat and you will have beautiful stickers.

Cricut Explore Essentials: How to Make Pretty Organizing Labels » Keys To Inspiration
How To Make Labels with the Cricut Maker - Two Crafty Makers Load this into your Cricut ready to cut and check that your blade matches the blade listed in Design Space. Hit the load/unload button: hit the up/down arrow on your Cricut Maker and then press the Cricut Go button which will be flashing. You can also hit go from Design Space.

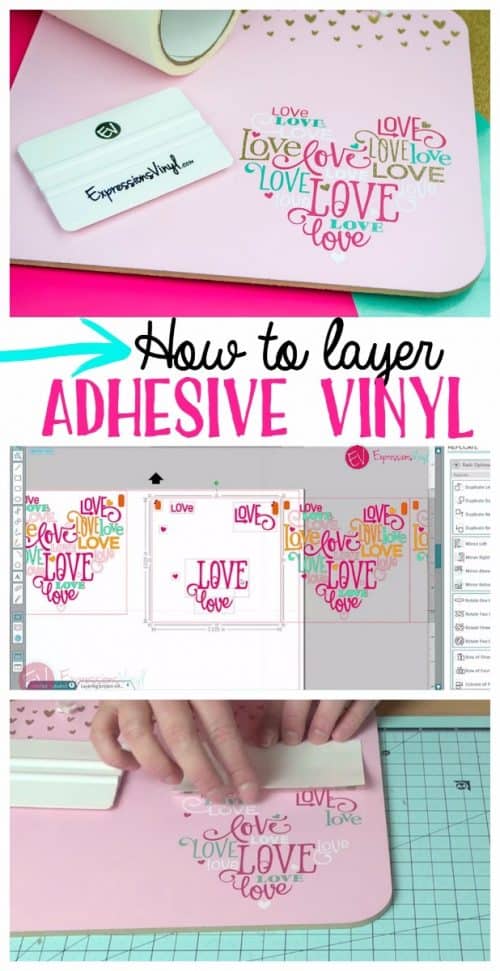
layer adhesive vinyl cricut - Daily Dose of DIY
How to Write on Tags & Labels With Cricut Pens The machine will then re-cut your single "registration" mark (the upper left square) and then proceed to write directly onto your pre-cut items! If you have lots of labels to make, simply peel off your tags, re-load your template, swap out the wording in Design Space, and run the mat through the machine again! Attaching the Tags to the Baskets

Diana's Designs: Personalized Anniversary Card Using Cricut Wedding Solutions
Cricut Labels: 3 Ways to Make Them - The Country Chic Cottage Choose both objects and click flatten to make the label a print then cut. Repeat for as many labels as you need. Print when prompted in Cricut Design Space then add to your machine for the cutting. Peel and stick the labels once complete to any surface. Tried this project? tag us to show off your work!

Cricut Explore Essentials: How to Make Pretty Organizing Labels » Christene Holder
How to Make Vinyl Labels with a Cricut | A Comprehensive Guide Start by opening Cricut Design Space and use the search bar in the Image Library to find pictures for everything you want to label. Select images that are both simple in design and intuitive to understand. Notice the three images I selected below are not single color/layer images when I first place them on my canvas.

Pin on Cricut
Make DIY Iron-On Fabric Name Labels | The DIY Mommy Instructions: Cut a piece of the Heat n Bond into a standard letter paper size (8 ½ " x 11") so that it will easily feed through your printer. Fuse the Heat n' Bond to the cotton canvas fabric with an iron on low heat (follow the directions on your Heat n Bond packaging). Trim the fabric to the size of the Heat n Bond.
Things To Make With A Cricut: DIY - Tips And Tricks - Fauxsho.org

How to Make Stickers Using the Cricut with Procreate Design - diyvinylcutters.com
Cricut Explore Essentials: How to Make Pretty Organizing Labels » Christene Holder Home

Cricut Explore Essentials: How to Make Pretty Organizing Labels » Christene Holder

A little of this and a little of that: Crazy Hair Day with the Help of our Cricut.

How to Make Name Label Sheets with the Cricut
Post a Comment for "40 how to make name labels on cricut"